October, formerly one of my favorite times of year, seems to trigger a ‘hunger games’ type of reaction from my very being. As the month approaches I feel a duplicative sense of anxiety and accomplishment. Two years ago, during Breast Cancer Awareness month, I was diagnosed with breast cancer. What unravels after that is a bizarre concoction of one part sanity, one part disbelief mixed with two heavy doses of fear. In my moments of clarity my goal was to make sure things were in order, smart decisions were made and that at all costs I protected those closest to me. In retrospect, I can tell you that having a goal did work.
I was luckier than many, and I managed to keep my anti-joiner resolve. I may have had to go done this path, but I did it my way. I refused to be defined by this illness – pink bows >no thank you<, hugs and long stares, wondering how I am REALLY doing >avoided at all costs<, and should anyone dare to call me a hero/warrior >I ran for the hills<. Okay, I am joking, to an extent.
I sincerely did appreciate how much people cared, and my inability to share my dark places with them was just a defect of me, being me. In many ways I wanted to press the fast forward button, and perhaps by not discussing it I was able to minimize some of the more scary elements.
Why bother discussing something that stripped away some of my memories and gave battle scars my family? It is the past, I am fine. And yet unceremonious revelations abound by the day. My tell tale signs of its aftermath are different than what I would have anticipated. For example, I appreciate the value of a smile, taking the time to laugh, a conversation that goes beyond what you may or may know about me on social media. I want to have fun; I want to feel alive; I want to just be happy. I want to spend time with people. I know this probably seems simple and hardly profound. There are other signs that I’ve changed.
I feel as if I’ve been to the dark side and back, and oddly enough, now I find that I gravitate towards natural light. Literally. In fact I crave it. I can’t seem to keep curtains or doors closed – I want the natural light to shine in.
I my measure success by being able to help others. I want to give back to those that are the difference in my world. I want to do all of those little things that make life memorable.
Food is something at the top of my list on how to keep things special and memorable. It is not that I am the only good cook in my house, it is more about my passion for it. It is the gift of my time.
As summer slipped into fall, I thought it might be nice to put the end of summer flavors in a jar. Ergo, another metaphor for light.
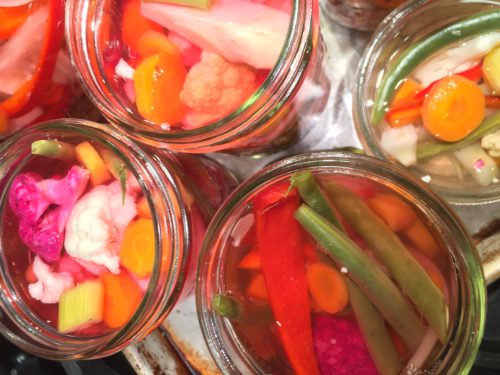
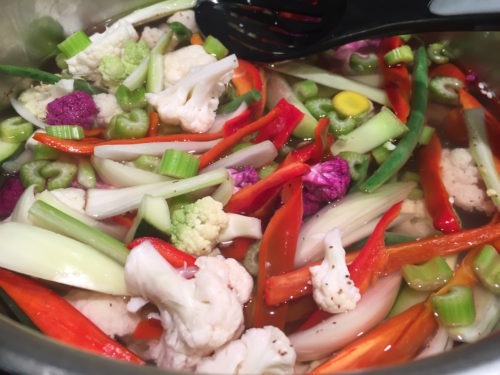
Pucker Up. Pickling is one of those magical preservation methods that not only extends a food’s shelf life, but also takes its flavor profile to interesting and delicious places. Cucumbers aren’t the only thing that can be pickled. These very robust flavored veggies have a nice garlic taste and a hint of sour vinegar tang. It’s high pickling season, so pull out those mason jars and get to work!
Giardiniera, or sottaceti, are colorful pickled vegetables that make a beautiful accompaniment to a charcuterie plate or can be added to rice or salad dishes.
Giardiniera
Ingredients
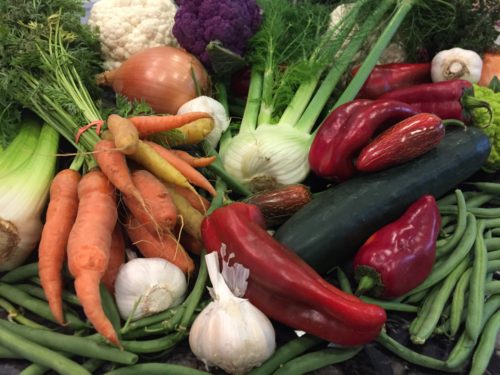
5 lbs mixed vegetables; cauliflower, celery, carrots, cucumbers, fennel, green beans, red peppers, zucchini, onions
8 cups white wine vinegar
4 cups water
7 cloves garlic, peeled and smashed
3 TBS salt
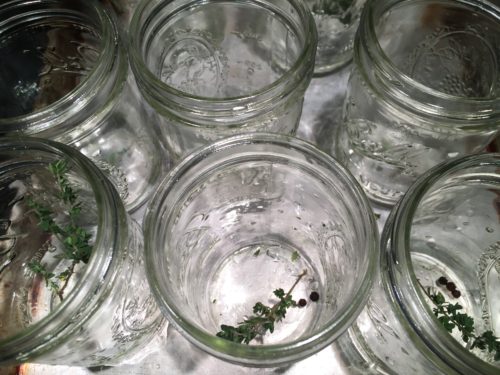
French or lemon thyme
1 jalapeno, seeded (optional)
Note: I made the full recipe and then jarred half of it before adding in the jalapeño.
Note: you can also conserve the vegetables by storing the mixture in oil rather than vinegar, which will keep the flavor balanced.
Directions
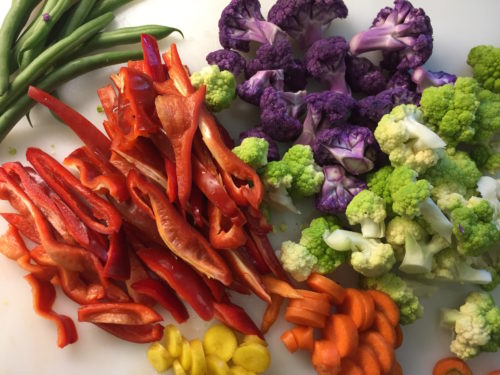
Clean and prepare the vegetables. Vegetables like the celery, zucchini and peppers can be cut into strips while cauliflower should be cut into sizes that will easily fit into a jar, about the size of walnut. For variety, cut carrots into round coins. Green beans can be cut in half and onions into small slices.
In a large stock pot, add the vinegar, water salt and bring to a boil. While some recipes will suggest that you cook each separately in the vegetable mixture, I like to mix the remainder of the ingredients together; keeping the thyme aside to place a sprig in each jar. Cook approximately 3 minutes until they are bright and starting to soften but still somewhat crunchy. At this point, the vegetables are ready to be eaten. To prepare them to share at a later date, continue the canning process. If not canning, vegetables will keep for up to 3 months.
Prepare canner, jars and lids. (If you’ve never canned, then let me give you a few more details: Prep the jars and lids for canning following the procedures for boiling water canning. Place lids in a small saucepan half full of water and place on low heat. Put the metal rack in the bottom of the stock pot or boiling water canner. If using screw bands, place them top up in the bottom. The purpose of the rack is to keep the jars from direct contact with the heated metal at the bottom of the pot, which could cause them to scorch or break. Place your clean jars into the canner and fill the container (and jars) half full of water. Turn on the stove to medium heat. Remove a jar from the boiling water canner, by this point the water in the canner should be pretty hot so use the jar lifter. DON’T put the jar directly on the counter as the change in temperature between the oven and the counter will cause the jars to break. It is best to place the jars either on a folded kitchen towel or a wooden surface.)
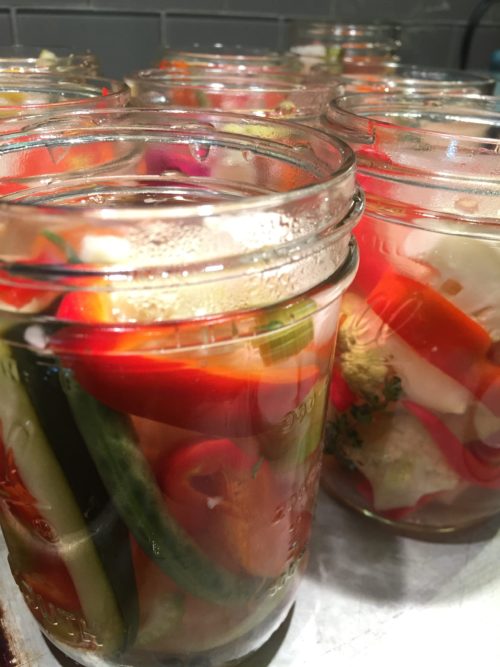
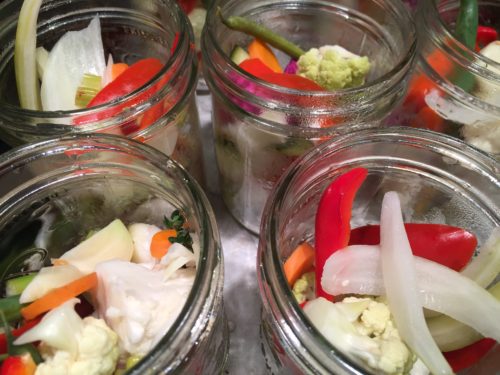
Pack vegetables evenly and colorfully into hot sterilized jars to within a 1/2 inch of top of jar. Ladle hot vinegar mixture into jar or add olive oil to cover the vegetables, leaving 1/2 inch headspace. Creating proper headspace in each jar is essential to achieving a proper seal and being able to safely store your jam. This is where the clear plastic ruler comes in handy. Remove any air bubbles by poking down into the mixture with chopstick or skewer. Clean the rim of the jar with a damp paper towel to make sure there’s no stray juice to interfere with the seal. Center lid on jar. Cap the jar with your lid and tighten the screw band until it is fingertip tight.
Place the jar back into the boiling water canner using your jar lifter. Once all your jars are filled, make sure they are completely covered with water (you may have to add a bit of additional water to the canner). Bring the water to a boil and then set your timer for 20 minutes. (Add 1 minute onto this time for each 1,000 ft above sea level.) When the timer goes off, remove the canner lid and wait 5 minutes. Why 5 minutes? If you don’t wait a few minutes the jostling of removing them from the canner could keep the jars from sealing. Another important tip is to remember to keep your jars upright as you remove them, titling to the side can also interfere with the seal. There’s nothing more satisfying than hearing “POP!” from across the room and knowing your jars are sealing, but you can’t sit around for a whole day for that sound.
In 24 hours go back and check all your jars. If you push down on the top and the lid gives, you didn’t get a solid seal. Immediately refrigerate or reprocess that jar. I usually take it one step further by taking off the screw band and holding the jar up by just its lid (with the other hand ready to catch, of course). If the lid doesn’t spring up and I can hold it up by just the edges of the metal lid, it has a nice seal.
![]()